install.packages(c("knitr", "rmarkdown"))Creating a Blog
Due: September 1116, 2025
The setup instructions were modified from Quarto’s page. If you aren’t using RStudio, visit the page for alternative instructions on how to set it up with Positron, VS Code, or using the Terminal + whatever text editor you like best.
Overview
Quarto websites include integrated support for blogging. Blogs consist of a collection of posts along with a navigational page that lists them in reverse chronological order. Blogs can include a custom about page, publish an RSS feed, and use a wide variety of themes.
This semester you will create a blog with multiple posts for your coding assignments. For this assignment, you will set up your blog and create your first post.
Do you have Quarto?
To begin, check if you have Quarto installed. In the R Console, type:
quarto::quarto_version()You should see a version number like from class when we checked our version of R and tidyverse. Otherwise, it will have a message that reads that quarto is not found.
If you need to install it, follow these steps:
- Go to the Quarto Get Started page.
- Choose the installer for your operating system:
- Windows: download the
.msiinstaller and run it. - macOS: download the
.pkginstaller and run it.
- Windows: download the
- After installation, restart RStudio.
To verify the installation, open the Terminal tab in RStudio (not the R Console) and run:
quarto checkYou should see the installed Quarto version and confirmation that it found R.
Instructions
Let’s get a simple blog up and running. After getting started, read on to learn about more advanced blog features and the requirements for the first assignment.
RStudio
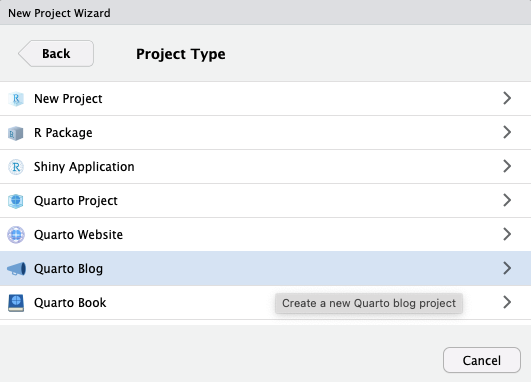
To create a new blog project within RStudio, use the New Project command and select Quarto Blog:

Then, provide a directory name by selecting Browse… for Mac or Change… on Windows (like somewhere in your Documents/) and options for the blog shown here:

Click Create Project.
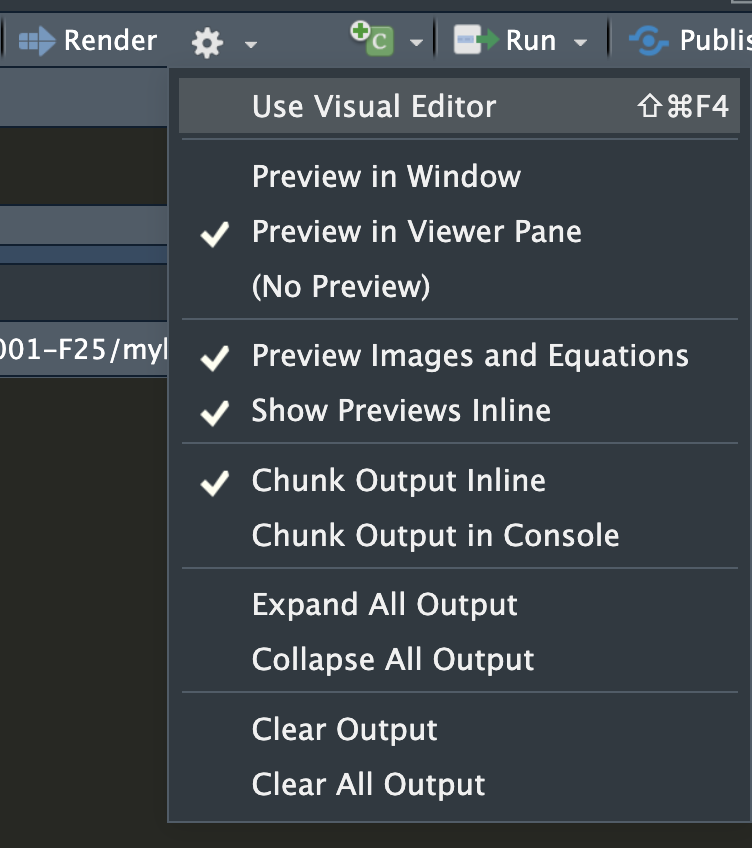
You can select how you want to preview the file: either in your browser or in the Viewer pane of RStudio. Click the gear icon next to Render and select Preview in Viewer Pane if you’d like it to display in RStudio. Select Preview in Window if you’d like it to preview in your default browser.
Then click the Render button to preview the blog:
You can check Render on Save so the documents re-render as you make and save changes. As you re-render index.qmd or render other files like about.qmd, the preview is automatically updated.
If you are having trouble rendering, check the Background Jobs panel for any error message. It could be you need additional packages installed. In that case, back in the R Console do:
If you still cannot render, copy the text in the Background Jobs panel and send it to me and your TAs or come to office hours.
Here’s a summary of the key files created within the starter blog project:
| File | Description |
|---|---|
_quarto.yml |
Quarto project file. |
index.qmd |
Blog home page. |
about.qmd |
Blog about page. |
posts/ |
Directory/folder containing posts |
posts/_metadata.yml |
Shared options for posts |
styles.css |
Custom CSS for website |
In the following sections we’ll take a closer look at the various components of the project.
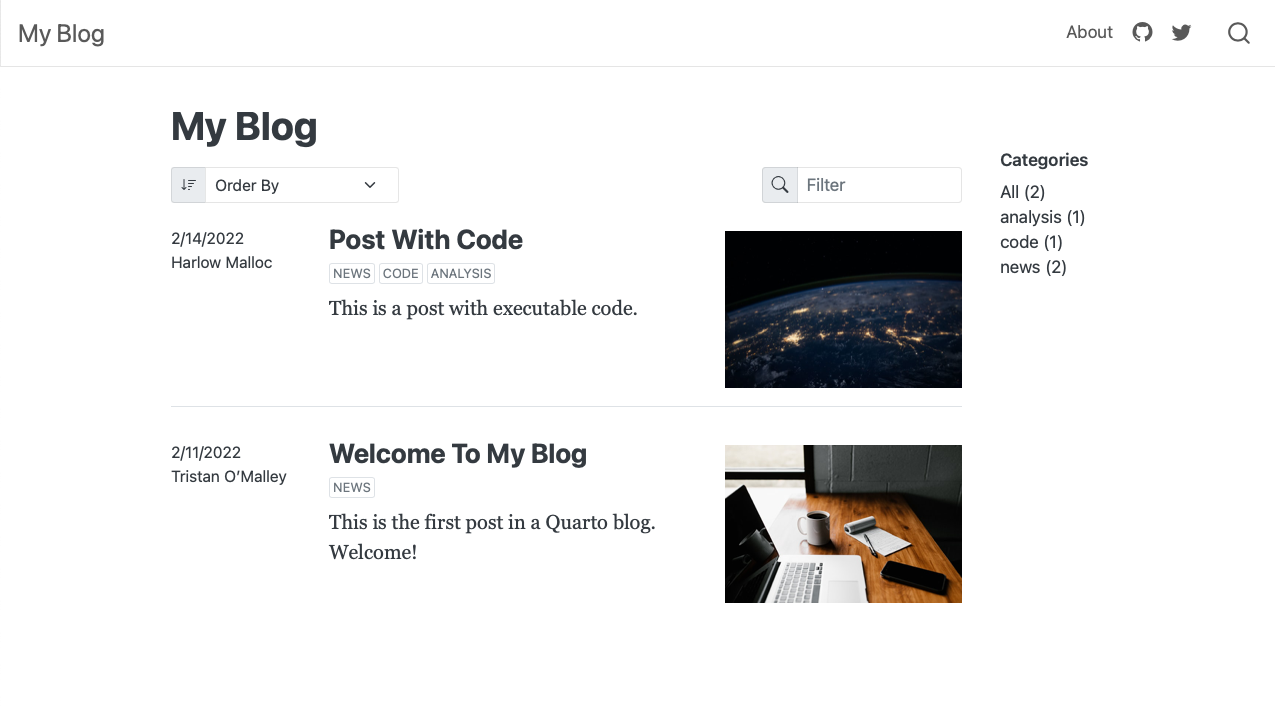
Home Page
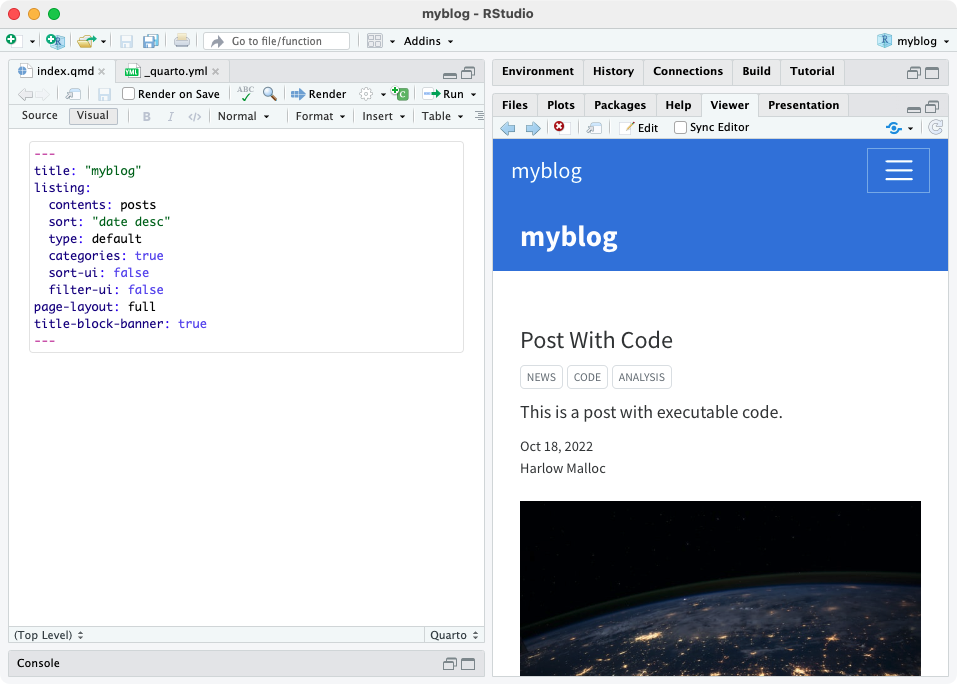
The home page is called index.qmd and renders to create the document index.html. This is the main page for most websites (e.g. www.google.com and www.google.com/index.html are the same page). The home page is formated as a listing page for all of the documents in the posts directory or folder:
To view the code, there are two options Visual and Source in the upper left. To see the code fully, you might select Source.
Below is the source code for the home page. The block at the top of a Quarto file between --- lines is YAML front matter. Instead, it stores metadata that Quarto uses to style and render the page/site (page-layout, listings, options). A few fields (like title, subtitle, author, date) may appear in the page header because the blog template is designed to show them, but they’re still metadata, not body text.
The webpage content starts after the closing ---.
The home page found in the file index.qmd will look like this:
---
title: "myblog"
listing:
  contents: posts
  sort: "date desc"
  type: default
  categories: true
  sort-ui: false
  filter-ui: false
page-layout: full
title-block-banner: true
---
When you render a new post, by adding a .qmd file to the posts/ folder, the listing page will automatically update, adding the most recent post to the top of the list.
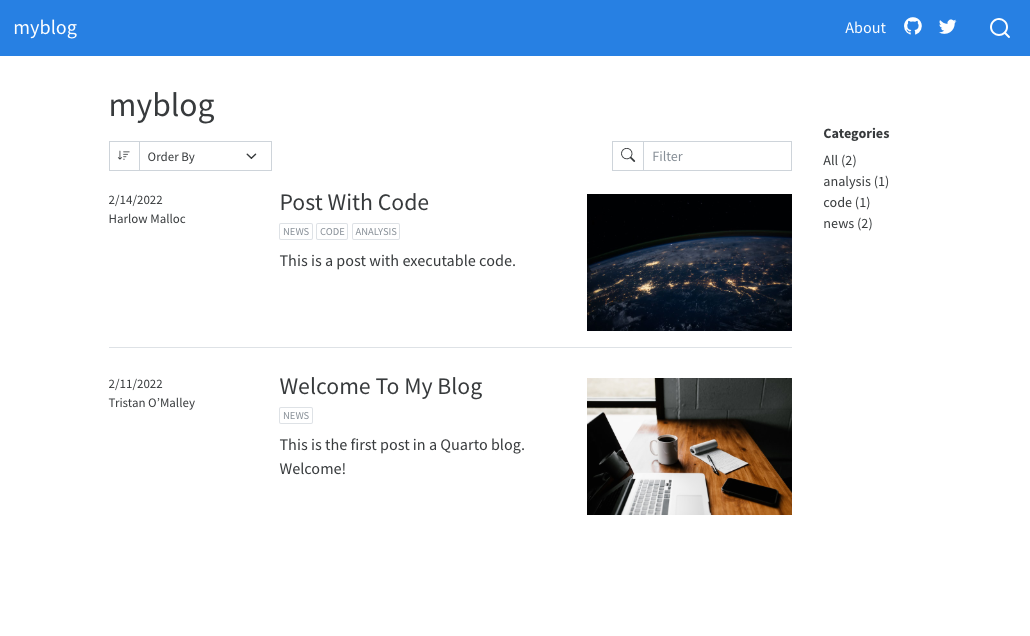
Categories
Categories are a type of metadata you can set in the YAML front matter of a Quarto post.
They work like hashtags on Instagram or flairs on Reddit which are labels that help group posts by topic.
For example, here’s what a post page might look like with with categories:
---
title: "Post With Code"
author: "Fizz McPhee"
date: "5/22/2021"
categories:
  - news
  - code
  - analysis
---
On a blog with categories enabled, these labels would appear on the listing page and let readers filter posts.
For this assignment, you don’t need to use categories. We’ll just focus on setting up the structure and adding some content.
In the index.qmd page:
Set
categories: false.Change the
titlevalue toDATS 1001.Add your name as the value for
author.Put a friendly greeting as the content and see where it shows up. By content, I mean stuff written beneath the YAML front matter, after the second
---. Leavecontents: posts.
About Page
The about.qmd document includes additional information on the blog and its author. For example:
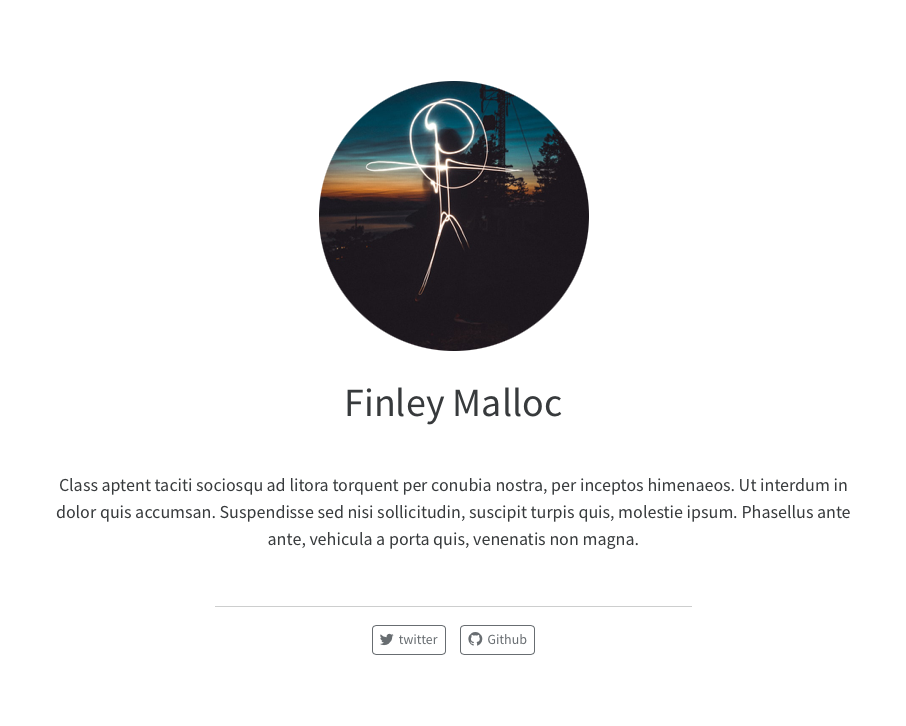
Here’s what the source code of an about.qmd might look like:
---
title: "About"
image: profile.jpg
about:
  template: jolla
  links:
    - icon: twitter
      text: Twitter
      href: https://twitter.com
    # (additional links excluded for brevity)
---

## About this blog

This is the contents of the about page for my blog.
See the article on About Pages to see the various options available for customizing page output.
In the about.qmd page:
Pick a theme: jolla, trestles, solana, marquee, or broadside.
Add your name as the value for either
authorortitle(whichever you prefer).Find an image of yourself or one that represents you. Put it in the same folder as your other files (
index.qmd,about.qmd, etc.). Add the filename of the image as the value forimage. Alternatively, you can use a url from an image on the internet (e.g.image: https://www.math.ucla.edu/~burnett/images/seapotato.jpg)
Posts Directory
The posts that make up the contents of the blog should be placed in the posts/ directory.
- Add a new post to your blog by creating a sub-directory within the
posts/directory, and creating aindex.qmdfile to the directory. The folder will be calledassignment1/. (In the diagram and text, I write a/in the names to indicate it’s a folder, but that’s not included in the name).
In posts/, there will be folders called post-with-code/ and welcome/ when the quarto blog is generated. You can delete those or even modify one of them so the folder name is assignment1/ and then change the text in the index.qmd inside that folder. You can also delete any generated images that aren’t your own.
This is the structure I expect from your blog:
myblog/              # your project folder
├─ _quarto.yml
├─ index.qmd
├─ about.qmd
├─ posts/            # folder where posts live
│  ├─ _metadata.yml
│  ├─ assignment1/   # new sub-directory for the post
│  │  └─ index.qmd   # the actual post file
│  └─ ...            # (other posts go here)
└─ is_me.jpeg     # the image for your About page
That index.qmd file is the new blog post and when you render that, the blog home page will automatically update to include the newest post at the top of the listing.
- Add some
YAMLcontent:
---
title: "Coding Assignment 1"
date: "2025-09-03"
---- From here I want you to make your first blog post about something you like. You should show some basics of markdown such as:
You can use my example from class as a reference.
Themes
Next, we’ll look at _metadata.yml inside posts/ which controls the shared metadata across all the documents in posts/. So if you want a particular theme across all posts, instead of putting the information in the YAML front matter of every file, you can put it here. If you want a common setting across the whole website, you can modify _quarto.yml.
- In
_metadata.yml, choose a theme to apply across all your posts. Hint: you can look at how thethemeis set for the website in_quarto.yml.
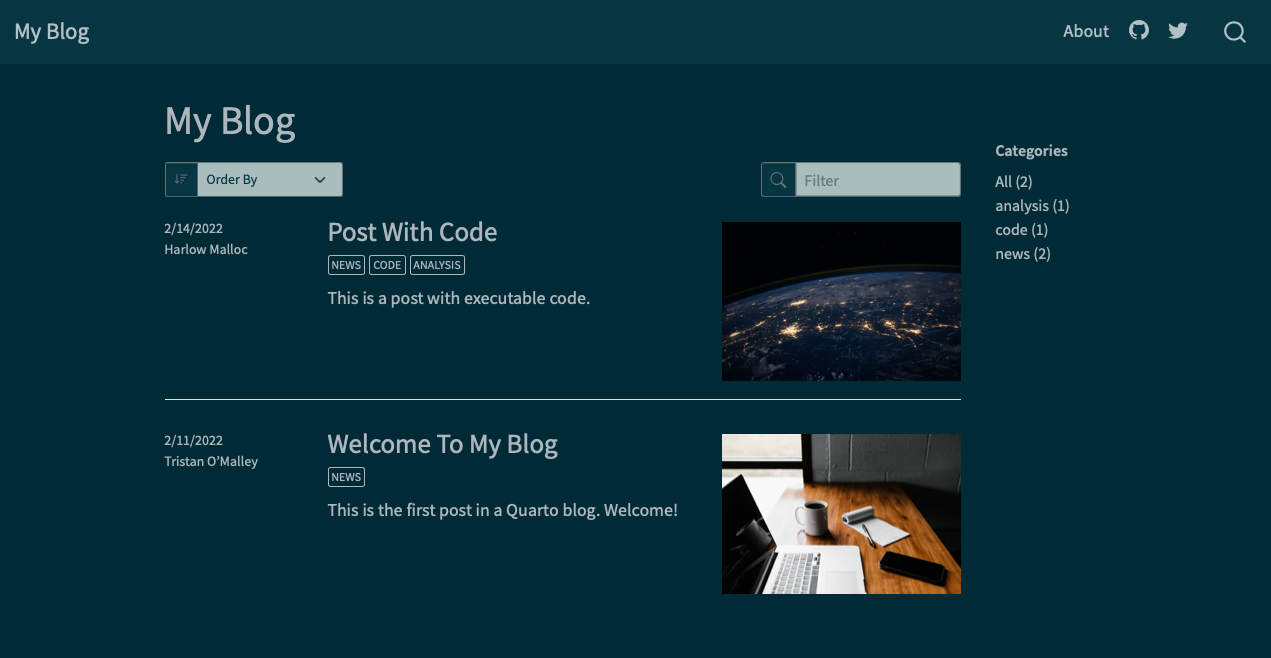
Blogs can use any of the 25 Bootswatch themes included with Quarto. The default blog generated by quarto create project uses the cosmo theme. Here are links to the available themes along with thumbnails of what the simple default blog looks like under a few of them:

Rendering
Sometimes you might run into problems rendering your blog — maybe you get an error, or your changes don’t appear. This is normal (it can happen if you rename folders, change an image, or switch themes). Here are some steps to try:
- Save all the files. Make sure everything is saved in RStudio. Unsaved files have a
*next to the filename in the tab. - Caching Hard refresh the Browser to reload the page. For Windows it’s Ctrl + Shift + R and Mac it’s Cmd + Shift + R. You can also try copying the
localhost:...url from the top bar and pasting it in another browser like Safari or Microsoft Edge (or Google Chrome’s Incognito mode). - Clean and re-render. Delete the folders
_freeze/and_site/and render your project again. - Check metadata files. If theme or style changes still don’t show, check that you updated the right YAML file (
_quarto.ymlfor the whole site, or_metadata.ymlinsideposts/). Also check that individual posts don’t override the theme in their own YAML.
Publishing
There are a wide variety of ways to publish Quarto blogs so they are viewable on the internet. Github can host your Quarto page for free. We will not do this in this assignment.
Grading
The assignment will be graded as follows:
- 1 point for doing each items 1-9, and 11.
- 1 point each for adding content and 1 point for completing each of the items in 10.
- There are 20 total points.
Submitting the Assignment
For the grading, you will submit the assignment to Gradescope.
Create your blog with the main directory like myblog/ and the posts directory posts/. Within it, have the first assignment called assignment1/ and it will have the file index.qmd. You will be submitting at least 6 files total: 3 .qmd, 2 .yml, and one image file. You might have more images–that’s fine. You will have to compress the files to preserve the directory tree.
This video might help:
(Posted on Blackboard under Assignments>Coding Assignment 1).